

How to Make Spicy Vinegar at Home
Spicy vinegar is a simple way to add heat and tang to your dishes. By infusing vinegar with chili peppers and optional aromatics like garlic or herbs, you can create a flavorful condiment tailored to your taste. Here’s what you need to know:
- Ingredients: Start with 2 cups of vinegar (white, apple cider, or even balsamic) and 10–15 chili peppers. Add garlic, herbal flavors, or spices for extra flavor.
- Tools: Use sterilized glass jars, gloves for handling peppers, and a funnel for easy transfer.
- Steps: Prep ingredients, combine them in a jar, and let the mixture infuse for 2 days to 3 weeks, depending on desired intensity.
- Storage: Keep in the fridge for 6–8 months, or a cool pantry for 2–3 months. Discard if mold, cloudiness, or off smells appear.
- Uses: Drizzle on greens, fried chicken, noodles, or seafood. It’s also great for marinades or dressings.
Whether you prefer mild jalapeños or fiery habaneros, making spicy vinegar at home is easy, affordable, and packed with flavor.
Ingredients for Homemade Spicy Vinegar
Core Ingredients
Start with fresh, high-quality ingredients to ensure a flavorful infusion. The base of your mixture is 2 cups of vinegar - distilled white vinegar provides a crisp, sharp tang that highlights the peppers, while apple cider vinegar offers a milder, fruit-forward alternative. For the heat, you'll need 10–15 fresh hot peppers, halved. Jalapeños are great for moderate spice, while habaneros pack a fiery punch. Add 3–5 garlic cloves (halved) for a savory undertone, 3 sprigs each of fresh oregano and thyme for herbal notes, 1 teaspoon of black peppercorns for a hint of complexity, and ½ teaspoon of kosher salt to round out the flavors.
"Always choose the freshest chili peppers for your infusions." – Mike Hultquist, Author, Chili Pepper Madness
Fresh chilies are key - they deliver more heat and a natural fruity essence. Ripe peppers in shades of red, orange, or yellow are sweeter and more flavorful, while green peppers have a sharper, less developed taste as they’re harvested earlier. When handling hot peppers like habaneros or Scotch bonnets, always wear gloves to protect your skin and avoid accidental irritation to your face or eyes. Each ingredient plays a crucial role in shaping the infusion's flavor, so choose carefully to set the stage for a bold and balanced result.
Premium Ingredient Options
If you're looking to elevate your spicy vinegar, premium alternatives can add depth and sophistication. For example, Big Horn Olive Oil's Traditional 18-Year Aged Dark Balsamic Vinegar (https://bhooc.com), priced at $8.99 per bottle, offers a luxurious alternative to standard white vinegar. Imported from Modena, Italy, this aged balsamic vinegar has a velvety sweetness and complexity that complements the heat of fresh peppers. Its 18-year aging process enhances the infusion with rich, layered flavors, making it perfect for gourmet dressings and marinades.
This option creates a refined balance of tanginess, sweetness, and spice. While distilled white vinegar serves as a neutral base to let bold spices shine, wine vinegars and aged balsamics provide a gentler acidity and fruity undertones. Your choice depends on the flavor profile you're aiming for - whether you want something bright and zesty or smooth and complex.
sbb-itb-4066b8e
Equipment and Preparation Tips
Equipment You'll Need
To make spicy vinegar safely and efficiently, you'll need a few essential tools. Start with sterilized glass jars or Mason jars, which are ideal for long-term storage. A small saucepan will help you heat the vinegar and aromatics, while a sharp knife and cutting board are necessary for prepping ingredients. Since handling hot chilies can be tricky, protective gloves are a must. A funnel makes transferring hot vinegar into narrow containers easier, and if you want a clear vinegar without solids, a sieve or fine-mesh strainer will come in handy.
| Equipment Item | Purpose | Essential/Optional |
|---|---|---|
| Glass Jar/Bottle | Storage and infusion | Essential |
| Tight-fitting Lid | Keeps the infusion airtight | Essential |
| Saucepan | Heating vinegar and aromatics | Essential |
| Protective Gloves | Safe handling of hot chilies | Essential |
| Funnel | Pouring hot liquid into containers | Recommended |
| Sieve/Strainer | Removing solids after infusion | Optional |
Once you’ve gathered your tools, you’re ready to move on to the preparation process.
Preparation Tips
The first step is to sterilize everything. Submerge jars and lids in boiling water or run them through a high-heat dishwasher cycle to eliminate bacteria. This step is critical for keeping your vinegar fresh during storage. Before adding the hot vinegar, warm the jars with hot tap water to avoid cracking.
"Heating the jar with warm water and then draining it before adding the hot brine ensures that the jar won't crack from an abrupt temperature change." – Sam Block, America's Test Kitchen
When handling chilies, always wear gloves to avoid contact with capsaicin, which can irritate your skin. Be sure to clean your knife and cutting board thoroughly afterward, and avoid touching your face during the process. When filling your jars, leave about 1/2 inch of space at the top to allow for proper sealing. Lastly, inspect your vinegar regularly - if it becomes cloudy, slimy, develops mold, or has an unusual smell, it’s best to discard it immediately.
HOW TO MAKE SPICED VINEGAR AT HOME | EASY STEP BY STEP RECIPE | SIMPLY EMS
How to Make Spicy Vinegar
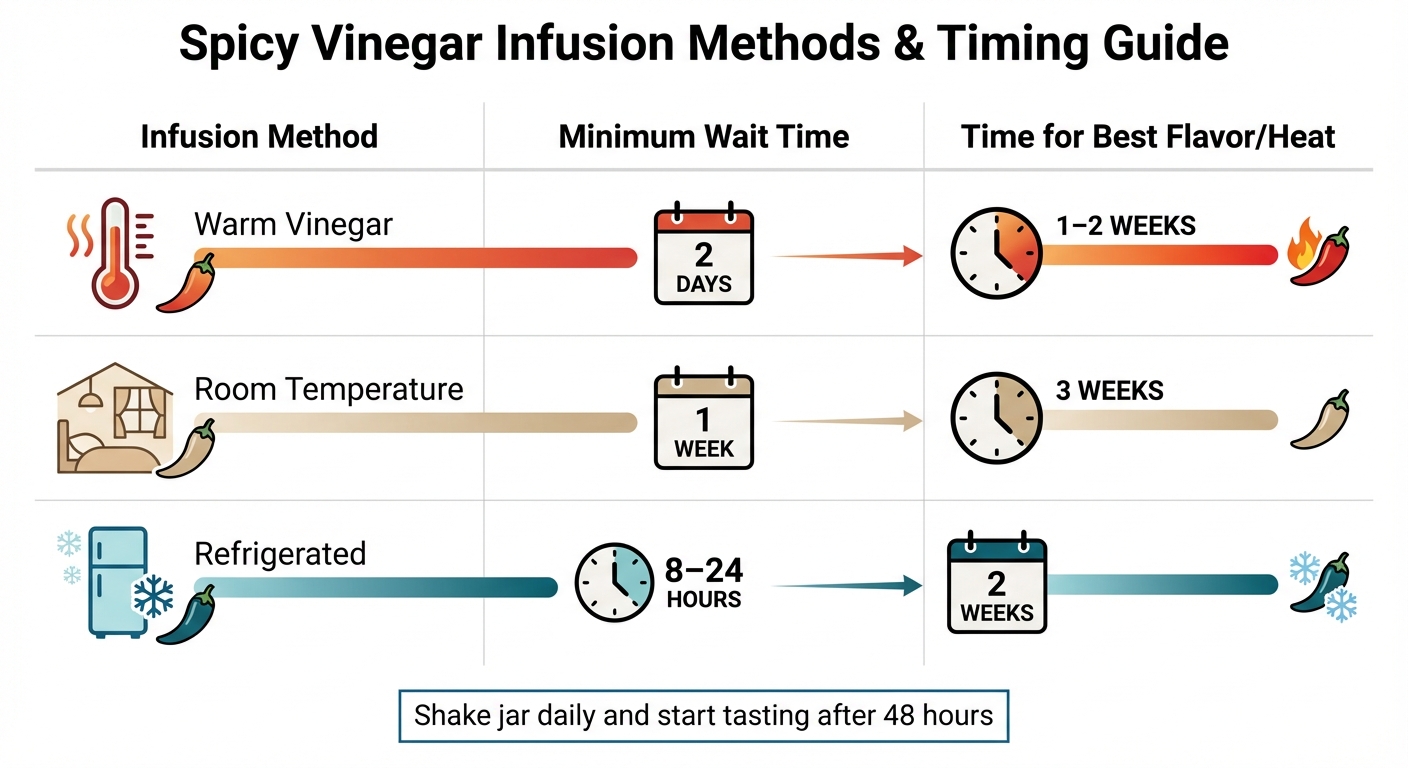
Spicy Vinegar Infusion Methods and Timing Comparison Chart
Step 1: Prepare Ingredients
Start by giving your fresh peppers a good wash and dry. Depending on how much heat you want, you can make a small slit in the peppers for a gentler kick or slice them into halves or rings for a stronger punch. If you're using dried chiles, poke them with a fork to help the vinegar soak in. Thinking about adding citrus zest? Make sure to carefully remove the white pith with a paring knife to avoid bitterness. For fresh peppers, blanch them in boiling water for 5–10 seconds to help release their flavors. Once everything is prepped, add your ingredients to a clean jar.
Step 2: Assemble the Mixture
Place your prepared peppers and any aromatics - like garlic, peppercorns, or herbs - into a sterilized jar. A good starting point for the vinegar-to-pepper ratio is 2:1 (e.g., 2 cups of vinegar for every 1 cup of peppers). For a milder infusion, you can use as little as 1 ounce of peppers per 16 ounces of vinegar. Pour the vinegar over the ingredients, leaving about ½ inch of headspace. Use room-temperature vinegar for a more delicate flavor, or gently warm it (without boiling) to speed up the infusion process. If you want a premium experience, try using high-quality vinegar - brands like Big Horn Olive Oil offer balsamic vinegars that can add an extra layer of depth. Once everything is in the jar, seal it tightly and give it a good shake to mix.
Step 3: Infuse and Strain
Here’s a quick guide to different infusion methods and their timing:
| Infusion Method | Minimum Wait Time | Time for Best Flavor/Heat |
|---|---|---|
| Warm Vinegar | 2 days | 1–2 weeks |
| Room Temperature | 1 week | 3 weeks |
| Refrigerated | 8–24 hours | 2 weeks |
Follow the timing that works for your method, shaking the jar daily and starting to taste after 48 hours. When you’re happy with the flavor, strain the vinegar through a damp cheesecloth or a coffee filter. If you prefer, you can leave the peppers in for a stronger infusion over time - just top off the jar with fresh vinegar as needed.
Flavor Variations and Customization
Recipe Inspirations
Once you've mastered the basic infusion technique, it's time to explore ways to tailor your spicy vinegar to different cuisines and flavor profiles. For a Southern-inspired twist, try using Tabasco or cayenne peppers with white vinegar and a pinch of salt. Let it infuse for just 1–2 days, and you'll have the perfect drizzle for collard greens or fried chicken. If you're leaning toward an Asian flair, infuse Thai chilis in rice vinegar for two weeks to create prik nam som, a condiment that pairs beautifully with sesame noodles or dipping sauces. Prefer something with a tropical kick? Caribbean-style vinegar uses Scotch Bonnet peppers in cane sugar vinegar, delivering a fruity, fiery punch. Chef Adam Schop describes these peppers as offering a "tropical, fruity punch".
The choice of chilies also matters - fresh chilies bring a bright, sharp heat, while dried ones add a deeper, more complex flavor. For a fragrant variation, combine coconut vinegar with lemongrass and ginger. This aromatic blend works wonders with seafood dishes. If you're after something herbaceous, red wine vinegar infused with rosemary, orange peel, and juniper berries is a fantastic match for roasted meats and barbecue. Meredith Laurence of Blue Jean Chef offers a helpful tip:
"Give the herbs a 'spank' or crumple them in your hand before adding them to the vinegar – this will help release the natural oils and give more flavor".
Looking for something even more luxurious? Premium balsamic vinegar infusions might be exactly what you need.
Balsamic-Infused Option
For a sweeter, more complex base, balsamic vinegar is an excellent choice. Big Horn Olive Oil's aged balsamic varieties - like their Traditional 18-Year Aged Dark Balsamic or Molto Denissimo 25-Year Aged - offer a rich, umami-packed profile that pairs beautifully with bold peppers like habaneros or dried arbol chiles. A 2:1 ratio of vinegar to peppers works well, and you can enhance the infusion with woody herbs like rosemary or spices like black peppercorns and fennel seeds. Heating the balsamic until it steams can help kickstart the infusion process. After letting it rest in the fridge for two weeks, you'll have a deeply flavorful condiment, perfect for glazing grilled meats or adding depth to salad dressings.
Comparison Table of Variations
| Variation Name | Main Ingredients | Infusion Time | Best Uses |
|---|---|---|---|
| Southern Style | Tabasco or cayenne peppers, white vinegar, salt | 1–2 days | Collard greens, fried chicken, hoppin' John |
| Thai (Prik Nam Som) | Thai chilis, rice or white vinegar | 2 weeks | Sesame noodles, dipping sauces |
| Caribbean Style | Scotch Bonnet peppers, cane sugar vinegar | 2 weeks | Grilled meats, tropical dishes |
| Aromatic Blend | Coconut vinegar, lemongrass, ginger | 2 weeks | Seafood, Asian-inspired marinades |
| Herb & Citrus | Red wine vinegar, rosemary, orange peel, juniper berries | 2 weeks | Roasted meats, barbecue, salad dressings |
| Spicy Balsamic | Balsamic vinegar, dried arbol chiles, rosemary, peppercorns | 2 weeks | Glazing grilled meats, steak sauce, rich salad dressings |
Storage, Shelf Life, and Usage Ideas
Storage and Shelf Life
To keep your infused vinegar fresh, store it in the refrigerator for 6–8 months. According to USDA FoodKeeper data, it can last up to 12 months if the acidity level is adequate. If you prefer pantry storage, make sure the vinegar is in a cool, dark place, where it will stay good for 2–3 months. Use glass jars with non-corrosive lids, such as plastic or sterilized corks, to avoid any reaction with the vinegar's acidity. Label each jar with the date and a list of ingredients to easily track freshness.
"The refrigerator is your friend here. The flavorings will take a little longer to infuse in the fridge, but the colder temperature will prevent any funkiness in the bottle."
Keep an eye out for signs of spoilage, like cloudiness, bubbling, mold, or an off smell. If you notice any of these, toss the batch immediately. Catherine Boeckmann, Executive Digital Editor and Master Gardener at The Old Farmer's Almanac, advises: "Discard the vinegar if there is mold or signs of fermentation, such as bubbling or cloudiness." Bulging lids can also be a red flag, indicating gas production from spoilage. Once your vinegar is safely stored, it’s time to explore how to use it in your cooking.
Ways to Use Spicy Vinegar
Spicy vinegar brings a bold, tangy punch to a variety of dishes. It's a classic finishing touch for Southern favorites like collard greens, hoppin' John, or sautéed okra. Drizzle it over fried chicken, pulled pork, or grilled meats to cut through the richness. For seafood lovers, mix it with minced shallots to whip up a mignonette sauce that pairs beautifully with oysters. You can also add a splash to stews, chili, or beans for a flavor boost, or use it as a marinade before grilling.
"A splash of this stuff will shoot you out of bed."
- Sam Block, America's Test Kitchen
Looking for more creative uses? Spicy vinegar works wonders on sesame noodles, pizza, pasta, crispy potatoes, and even boiled eggs. It also makes a zesty base for salad dressings or pan sauces. For an extra fiery kick, chop up the infused peppers and mix them directly into your dishes. The possibilities are endless!
Conclusion
Making your own spicy vinegar at home is a great way to customize flavors while keeping costs low. Why spend extra on store-bought options when you can whip up a personalized blend using ingredients you likely already have? As Bon Appétit wisely notes, "You don't need an arsenal of expensive vinegars to cash in on big flavor - you can make your own."
The best part? You’re in control. Adjust the heat level to your liking, whether you prefer the gentle warmth of jalapeños or the fiery punch of habaneros. Pick your favorite vinegar base and skip the hidden additives found in many commercial options.
Get creative with your combinations - pair crisp white vinegar with Thai chiles for a bold kick, or opt for rice vinegar to achieve a softer, sweeter balance. Want to take it up a notch? Try Big Horn Olive Oil's Traditional 18-Year Aged Dark Balsamic Vinegar from Modena, Italy. Its deep, rich flavors will add a complexity that ordinary vinegars just can’t match.
Start small to experiment with flavors, and once you’ve nailed your perfect recipe, make a larger batch. Properly stored in the fridge, your homemade spicy vinegar can last 6–8 months, ready to enhance dishes like collard greens, grilled meats, and so much more.
The process is straightforward, the results are satisfying, and the flavor possibilities are endless. Grab your favorite peppers and vinegar, and start crafting your signature blend today!
FAQs
Do I need to refrigerate spicy vinegar?
Spicy vinegar usually doesn’t need refrigeration because its high acidity works as a natural preservative. When kept in a cool, dark spot, it can stay shelf-stable for months. That said, if you want to preserve its flavor and freshness for an extended time, refrigerating it is a good choice. Homemade versions with a strong vinegar base can last up to three months or longer without being refrigerated.
How can I make it less spicy?
If you want to tone down the spiciness of your vinegar, there are a few easy tweaks you can make. Start by using fewer hot peppers or removing their seeds, as the seeds pack most of the heat. After the infusion, you can dilute the mixture with plain vinegar or even water to soften the kick. Another option? Cut the infusion time short or take out the peppers earlier. These adjustments let you control the spice level to match your taste.
Can I reuse the peppers for a second batch?
Yes, you can reuse the peppers for a second batch, but don’t expect them to pack the same punch. The flavor and heat will be noticeably milder compared to the first infusion. Peppers preserved in vinegar can be reused several times, but their intensity fades with each round. If you want a bolder flavor, try adding some fresh peppers to the mix for the second batch.